Visual BASIC is an object oriented programming language that is native to the Windows Operating system. It was derived from the QBASIC programming language in 1991. It quickly became one of the most popular programming languages due to its simplicity.
Unlike other programming languages, Visual BASIC can only be compiled and run on the Windows Operating system. Also unlike other languages, the code in Visual BASIC may not work with other versions of the language. For this tutorial we will be using the Visual BASIC .NET 2005 Express editions. You can download it for free here.
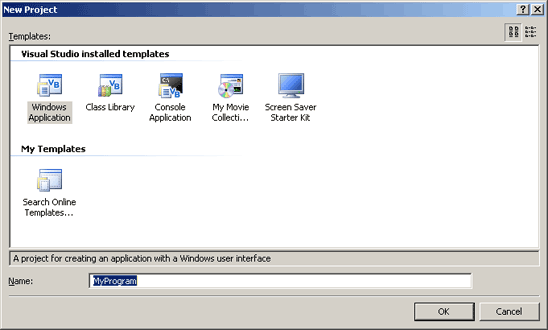
Once you have Visual BASIC installed, run it and go to file/new project. Make sure Windows Application is selected, then enter a name for your project. Every project will need to have a unique name because all the files for that project will go in a folder with that name. Now click OK.
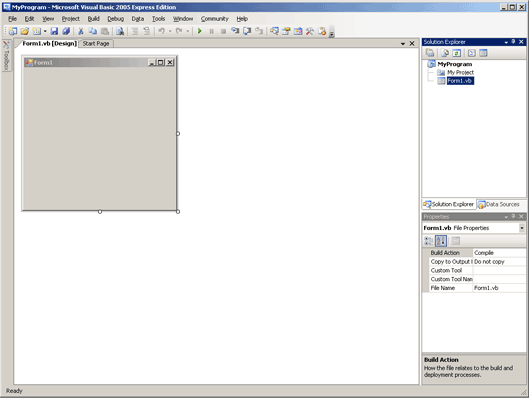
You should now be looking at a screen that looks like this:
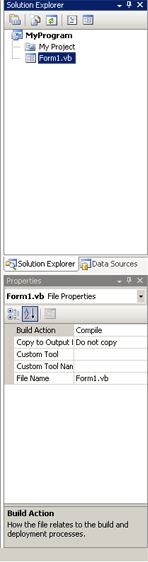
On the right hand side, there’s two panes, one’s the Solution Explorer. Directly under the Solution Explorer is the Properties Window. In the Solution Explorer you will see all the forms and classes, and anything else that is external to the program, while the Properties Window displays all the properties that the current selected object has.
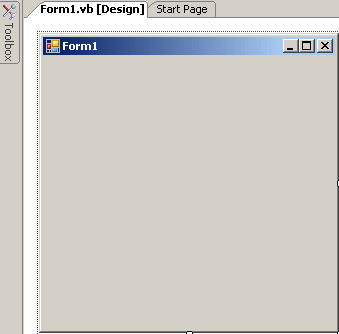
On the left you should see a gray box with the words Form1 at the top. This is a form, all of your components (buttons, labels, text boxes, etc.) will go on the form. You can increase or decrease the form’s size to as big or as little as you want. Click on the form and then look in the properties window. Those are all the properties that the form object has, you can change them if you want to.
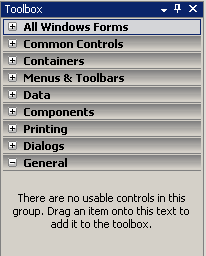
Next to the form, there is the word toolbox. This is where all your components that you can add are. If you put your mouse on it and wait a bit a menu will come up. If you click on the pushpin at the top of the popup, next to the X then it will keep the toolbox in site. This will save much time when creating your programs. If you click All Windows Forms, the complete list of all components will come up. Everything else is just narrowing it down by different categories.
You should now be familiar with the Visual BASIC .NET 2.0 environment, in the next section we begin adding components and making them interact with each other.
C++ is a multi-paradigm programming language that supports object oriented programming (OOP) and other forms of pogramming as well. It was derived from the C programming language and was first implemented by AT&T in 1983. C++ is a strictly typed language, which means that Cat would not be the same as CAT or cat.
In order to make executables using the C++ you will need a compiler. For the purposes of this tutorial we will be using the Microsoft Visual Studio .NET 2005 programming environment. If you choose to use a different compiler, then I suggest you move onto the next tutorial. You can download Visual C++ for free here
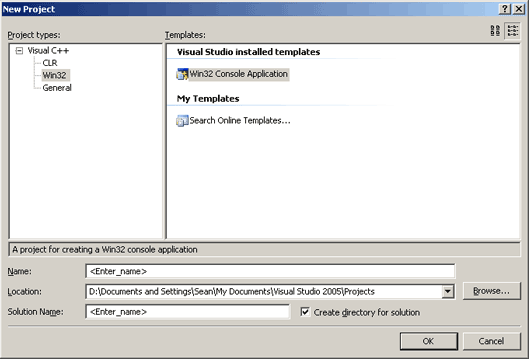
Once you have Visual C++ installed go to File/New/Project then click Win32 then Win32 Console Application. Under name is where you will put the name of your project. Every project needs to have a unique name because all the files associated with your project will be going in the folder with that name. Then click OK.
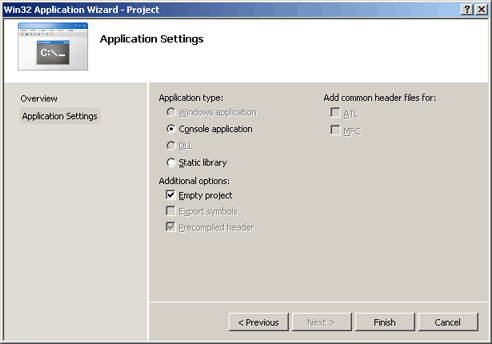
Once you do that the application wizard comes up. Click application settings and select console application under Application Type and under Additional Options check Empty Project. Then click Finish.
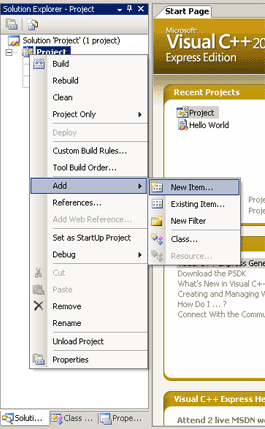
On your left will be a pane with the project name you chose. This pane is called the Solution Explorer. All the files that your program needs to run will show up here. All the folders are empty right now, but we need to add a file that we can write code in. Right click on the name you chose then select Add then New Item.
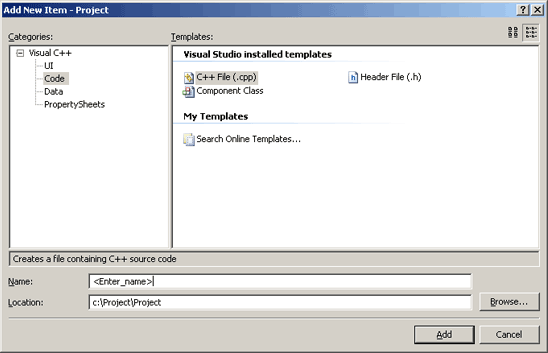
You should now be looking at an Add New Item screen. Since we want to be able to write code, click on code in the left pane. You should see some different types of files you can add. Among them are a C++ file (.CPP) and a Header file (.h) A header file is a file that contains functions written by other programmers. In C++ there are only a handful of built in functions, and many of the functions that other programming languages offer, C++ does not. To rectify this, however, there are headers that come with Visual C++ that we can take advantage of. Click on the C++ file (.CPP) because that’s where all our code will go.
You should now be looking at a blank file with your cursor in it. This is where all the code will go.
An algorithm is a basic idea of a program before any code is actually written. There are a few ways in which this can be done, the two most common are through flowcharts and pseudocode. Once you have been programming for a while, one can usually make a flowchart in their mind without actually writing anything down.
Pseudocode- pseudo meaning fake, code meaning instructions in which the computer understands When we say pseudocode, what we really mean is a simple outline of your program. Pseudocode is usually written in plain english, with each instruction being written on one line. The program starts at the top of the page, and works its way down, just like any program, with functions being in a seperate from the main page.
Main Program … Pseudo code goes here … End Main ProgramFunctions … Your Functions would go here … End Functions
Flow charts are another way to outline your program. With flow charts the information for the program would be in symbols specifically designed for that statement. Here are a list of symbols:
Terminal Symbol This symbol indicates a beginning or ending point in a flowchart. Every chart should begin and end with this symbol.
Input/Output Symbol This symbol represents input coming in from the keyboard, a file, or elsewhere, or that information is being written to a disk or the screen.
Process Symbol This symbol represents any single process in an algorithm. Processes include Mathematical functions and other things of that nature.
Predefined Process This is a predefined module/function and has its own flowchart.
Decision Symbol The decision symbol is used when a program needs to make a decision. Usually used with if statements, but can be used with other decision making structures.
Flow Lines Flow lines connect the symbols in a flowchart. They contain an arrow head when the flow isn’t from top to bottom or left to right.
Personally I feel that flowcharts can get confusing and way too complicated, so I like to stick with the pseudo code. It is important to have a good idea of what your program is supposed to do and what it is expected to do. Sitting down and just writing code trying to make it work anyway possible is not a good way to write code, as it can get complicated and turn into speghetti code. Speghetti code is having code that is all over the place when there is a simple solution.
If you are having problems with your programming, then you are probably getting an error. There are two types of errors: syntax and logic. A syntax error will usually be caught by the compiler, or interpreter. This type of error includes forgetting semicolons in some languages or curly braces in others. Logic errors usually come from user error. Like putting a 3 where it is meant to be a 2. The compiler/interpreter usually won’t catch these and is up to you to catch them.
Hey, I am the creator of LepsLair and we have a lot of great things coming up. I am hoping to have a huge new section that will show a peak of where we are going live soon.